ADK TypeScript 빠른 시작
이 가이드는 TypeScript용 Agent Development Kit(ADK) 사용을 시작하고 실행하는 방법을 보여줍니다. 시작하기 전에 다음 항목을 설치했는지 확인하세요.
- Node.js 24.13.0 이상
- Node Package Manager (npm) 11.8.0 이상
에이전트 프로젝트 생성
프로젝트용 빈 my-agent 디렉터리를 생성합니다.
프로젝트 및 의존성 구성
npm 도구를 사용해 프로젝트 의존성을 설치합니다.
여기에는 패키지 파일, ADK TypeScript 메인 라이브러리, 개발 도구가 포함됩니다.
my-agent/ 디렉터리에서 아래 명령을 실행해 package.json을 생성하고 의존성을 설치합니다.
cd my-agent/
# ES 모듈로 프로젝트 초기화
npm init --yes
npm pkg set type="module"
npm pkg set main="agent.ts"
# ADK 라이브러리 설치
npm install @google/adk
# 개발 도구를 dev dependency로 설치
npm install -D @google/adk-devtools
에이전트 코드 정의
getCurrentTime이라는 Function Tool의 간단한 구현을 포함한
기본 에이전트 코드를 만듭니다.
프로젝트 디렉터리에 agent.ts를 만들고 다음 코드를 추가합니다.
import {FunctionTool, LlmAgent} from '@google/adk';
import {z} from 'zod';

/* Mock tool implementation */
const getCurrentTime = new FunctionTool({
  name: 'get_current_time',
  description: 'Returns the current time in a specified city.',
  parameters: z.object({
    city: z.string().describe("The name of the city for which to retrieve the current time."),
  }),
  execute: ({city}) => {
    return {status: 'success', report: `The current time in ${city} is 10:30 AM`};
  },
});

export const rootAgent = new LlmAgent({
  name: 'hello_time_agent',
  model: 'gemini-2.5-flash',
  description: 'Tells the current time in a specified city.',
  instruction: `You are a helpful assistant that tells the current time in a city.
                Use the 'getCurrentTime' tool for this purpose.`,
  tools: [getCurrentTime],
});
API 키 설정
이 프로젝트는 Gemini API를 사용하므로 API 키가 필요합니다. Gemini API 키가 없다면 API 키 페이지에서 Google AI Studio를 통해 키를 생성하세요.
터미널 창에서 다음과 같이 .env 파일에 API 키를 기록해 환경 변수를 설정합니다.
ADK에서 다른 AI 모델 사용
ADK는 여러 생성형 AI 모델을 지원합니다. ADK 에이전트에서 다른 모델을 구성하는 방법은 Models & Authentication을 참조하세요.
에이전트 실행
@google/adk-devtools 라이브러리를 사용해 ADK 에이전트를 실행할 수 있습니다.
run 명령으로 대화형 CLI를 사용하거나 web 명령으로 ADK 웹 사용자 인터페이스를 사용할 수 있습니다.
두 방식 모두 에이전트를 테스트하고 상호 작용할 수 있습니다.
CLI로 실행
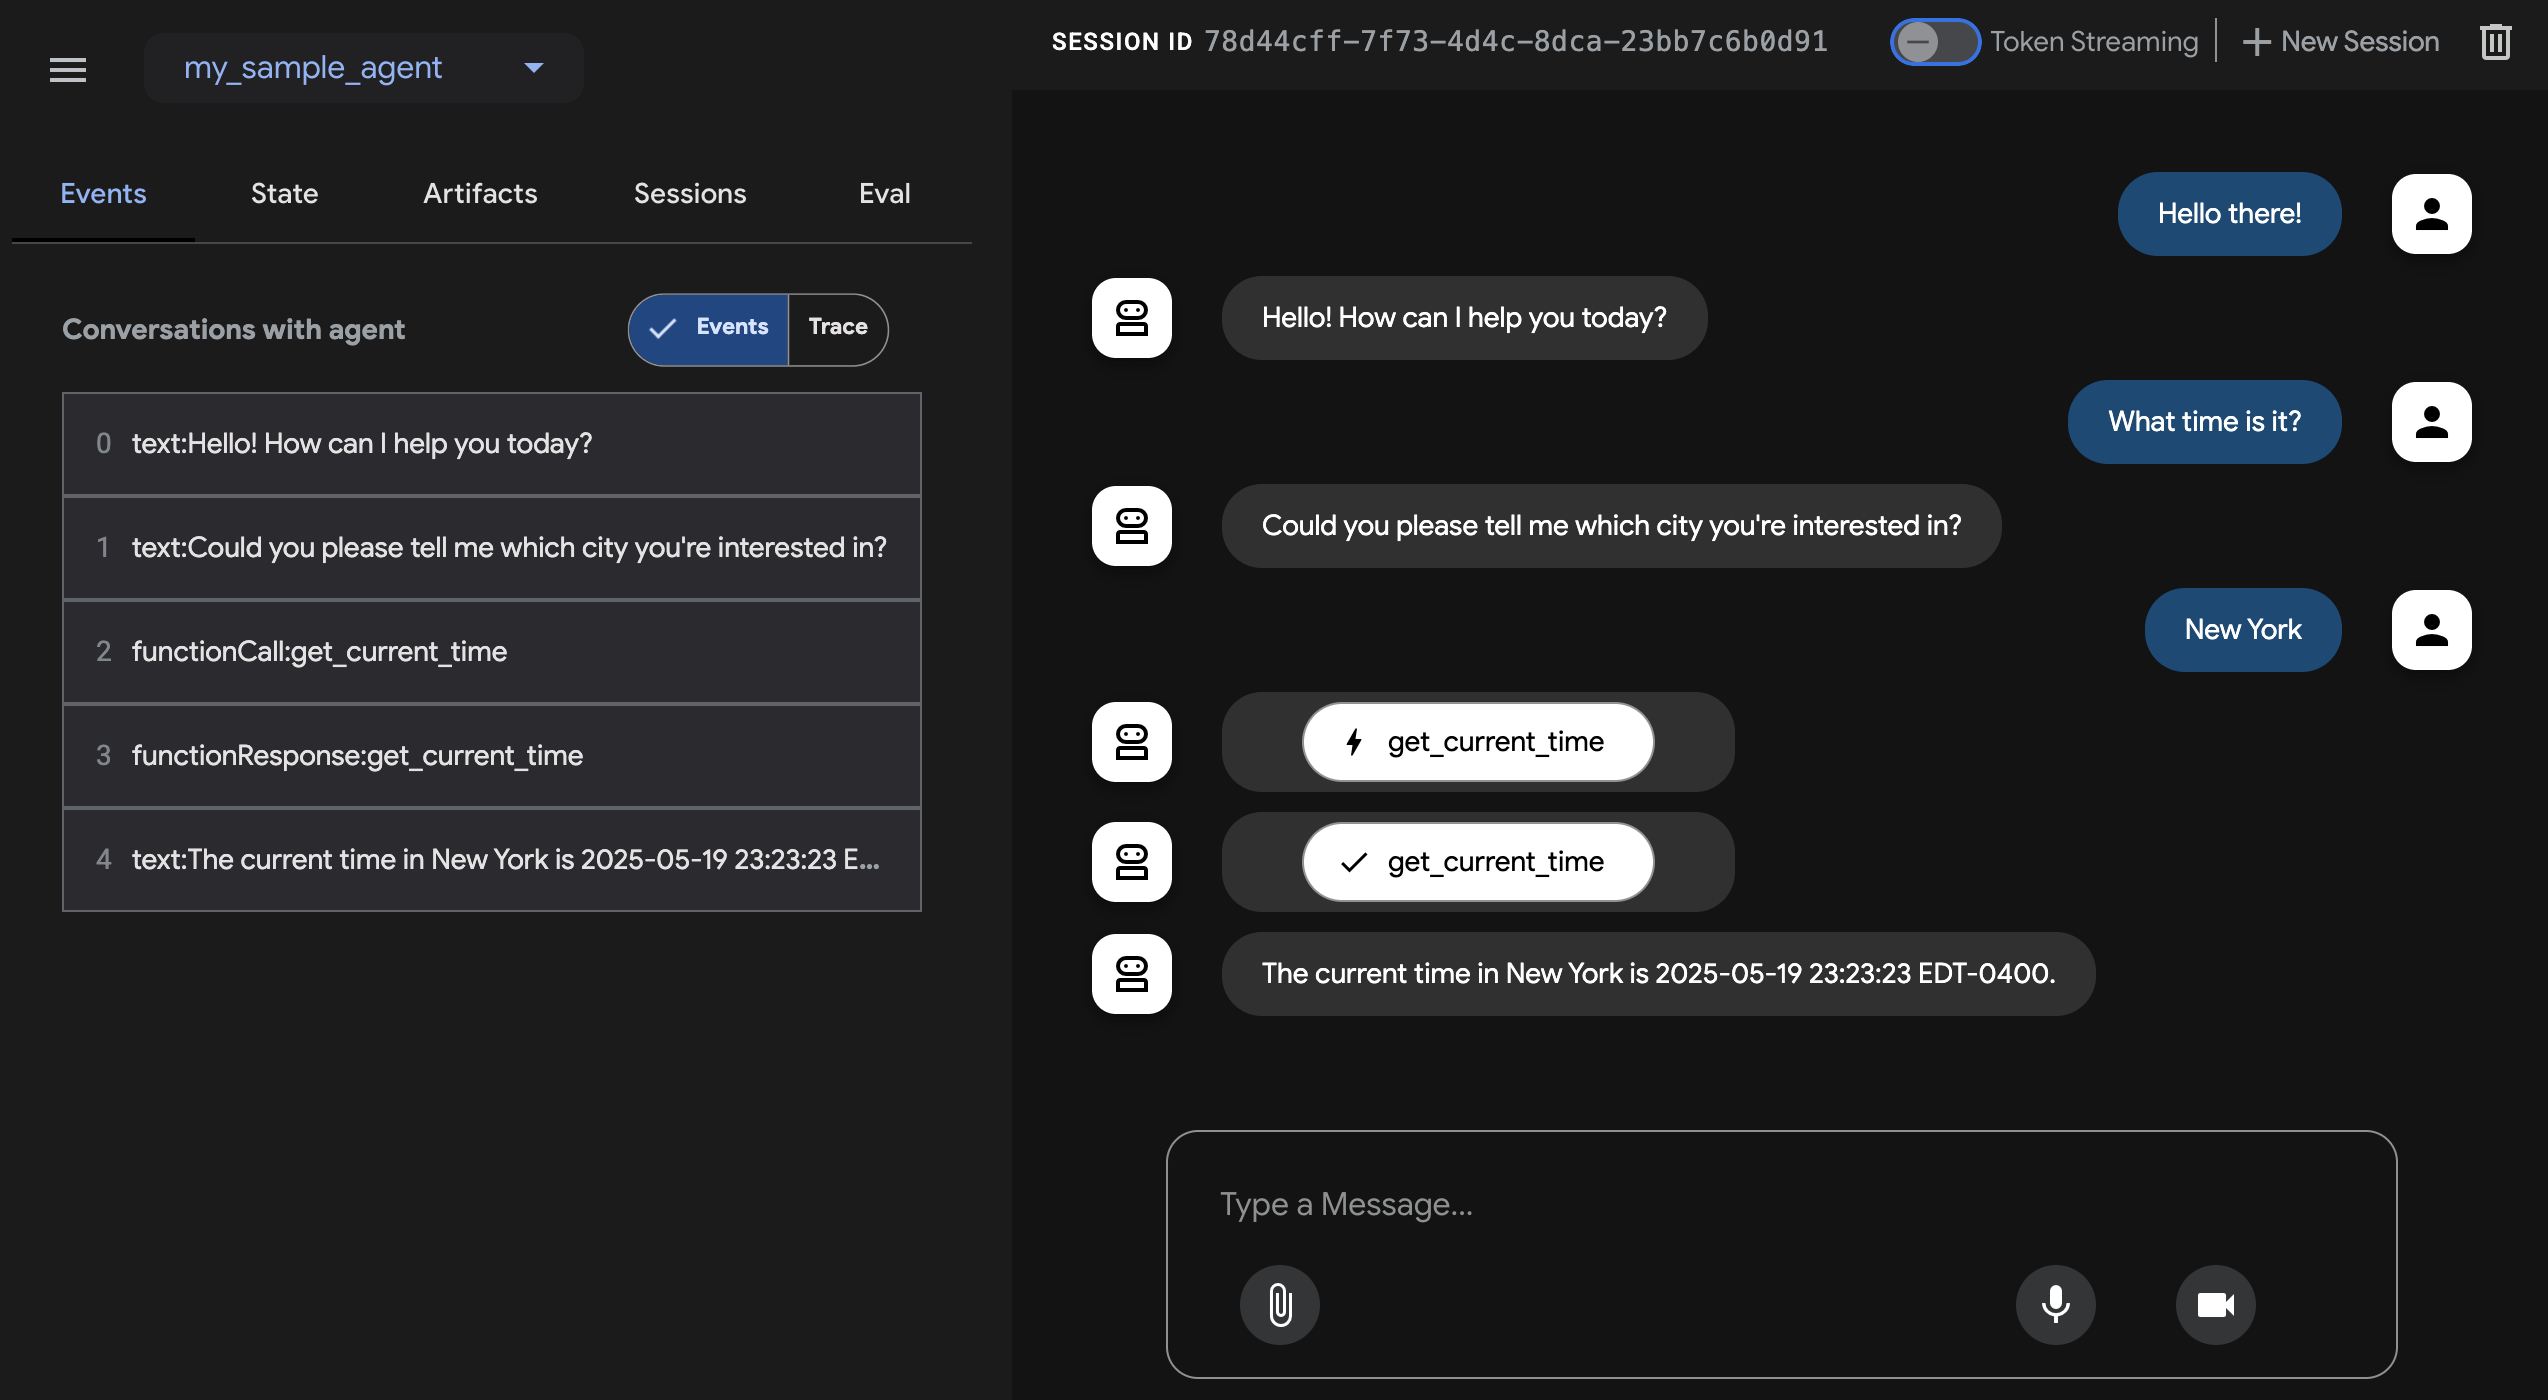
웹 UI로 실행
이 명령은 에이전트를 위한 채팅 인터페이스가 포함된 웹 서버를 시작합니다.
웹 인터페이스는 http://localhost:8000에서 사용할 수 있습니다. 오른쪽 상단에서
에이전트를 선택하고 요청을 입력하세요.
주의: ADK Web은 개발용만 사용하세요
ADK Web은 프로덕션 배포용이 아닙니다. 개발 및 디버깅 목적으로만 사용해야 합니다.
다음: 에이전트 빌드하기
ADK를 설치하고 첫 번째 에이전트를 실행했다면, 이제 빌드 가이드를 사용해 자신만의 에이전트를 만들어 보세요.