ADK 向け Google Cloud Application Integration ツール
ApplicationIntegrationToolset を使うと、 Salesforce、ServiceNow、JIRA、SAP などに対応する Integration Connectors の 100 以上の事前構築コネクタを通じて、 エージェントに企業アプリへの安全かつガバナンスされたアクセスを シームレスに付与できます。
オンプレミスと SaaS の両方をサポートします。 さらに既存の Application Integration プロセス自動化を、 Application Integration ワークフローを ADK エージェントのツールとして提供することで agentic workflow に変換できます。
Application Integration 内の federated search により、 ADK エージェントで複数の企業アプリとデータソースを 同時にクエリできます。
この動画ウォークスルーで Application Integration の ADK Federated Search の動作を確認
前提条件
1. ADK をインストール
installation guide の手順に従って Agent Development Kit をインストールします。
2. CLI をインストール
Google Cloud CLI をインストールします。 デフォルト認証情報でツールを使うには、次のコマンドを実行します:
gcloud config set project <project-id>
gcloud auth application-default login
gcloud auth application-default set-quota-project <project-id>
<project-id> は Google Cloud プロジェクトの一意 ID に置き換えてください。
3. Application Integration workflow をプロビジョニングし、Connection Tool を公開
エージェントで利用したい既存の Application Integration workflow または Integrations Connector connection を使用します。必要に応じて新しい Application Integration workflow または connection を作成することもできます。
テンプレートライブラリから Connection Tool を import して publish します。
注意: Integration Connectors のコネクタを使うには、 connection と同じリージョンに Application Integration をプロビジョニングする必要があります。
4. プロジェクト構成を作成
5. ロールと権限を設定
ApplicationIntegrationToolset のセットアップに必要な権限を得るには、 プロジェクトで次の IAM ロールが必要です (Integration Connectors と Application Integration Workflows 共通):
- roles/integrations.integrationEditor
- roles/connectors.invoker
- roles/secretmanager.secretAccessor
注意: Agent Engine (AE) でデプロイする場合、
roles/integrations.integrationInvoker を使うと 403 エラーになることがあります。
代わりに roles/integrations.integrationEditor を使用してください。
Integration Connectors を使う
Integration Connectors を使ってエージェントを企業アプリへ接続します。
始める前に
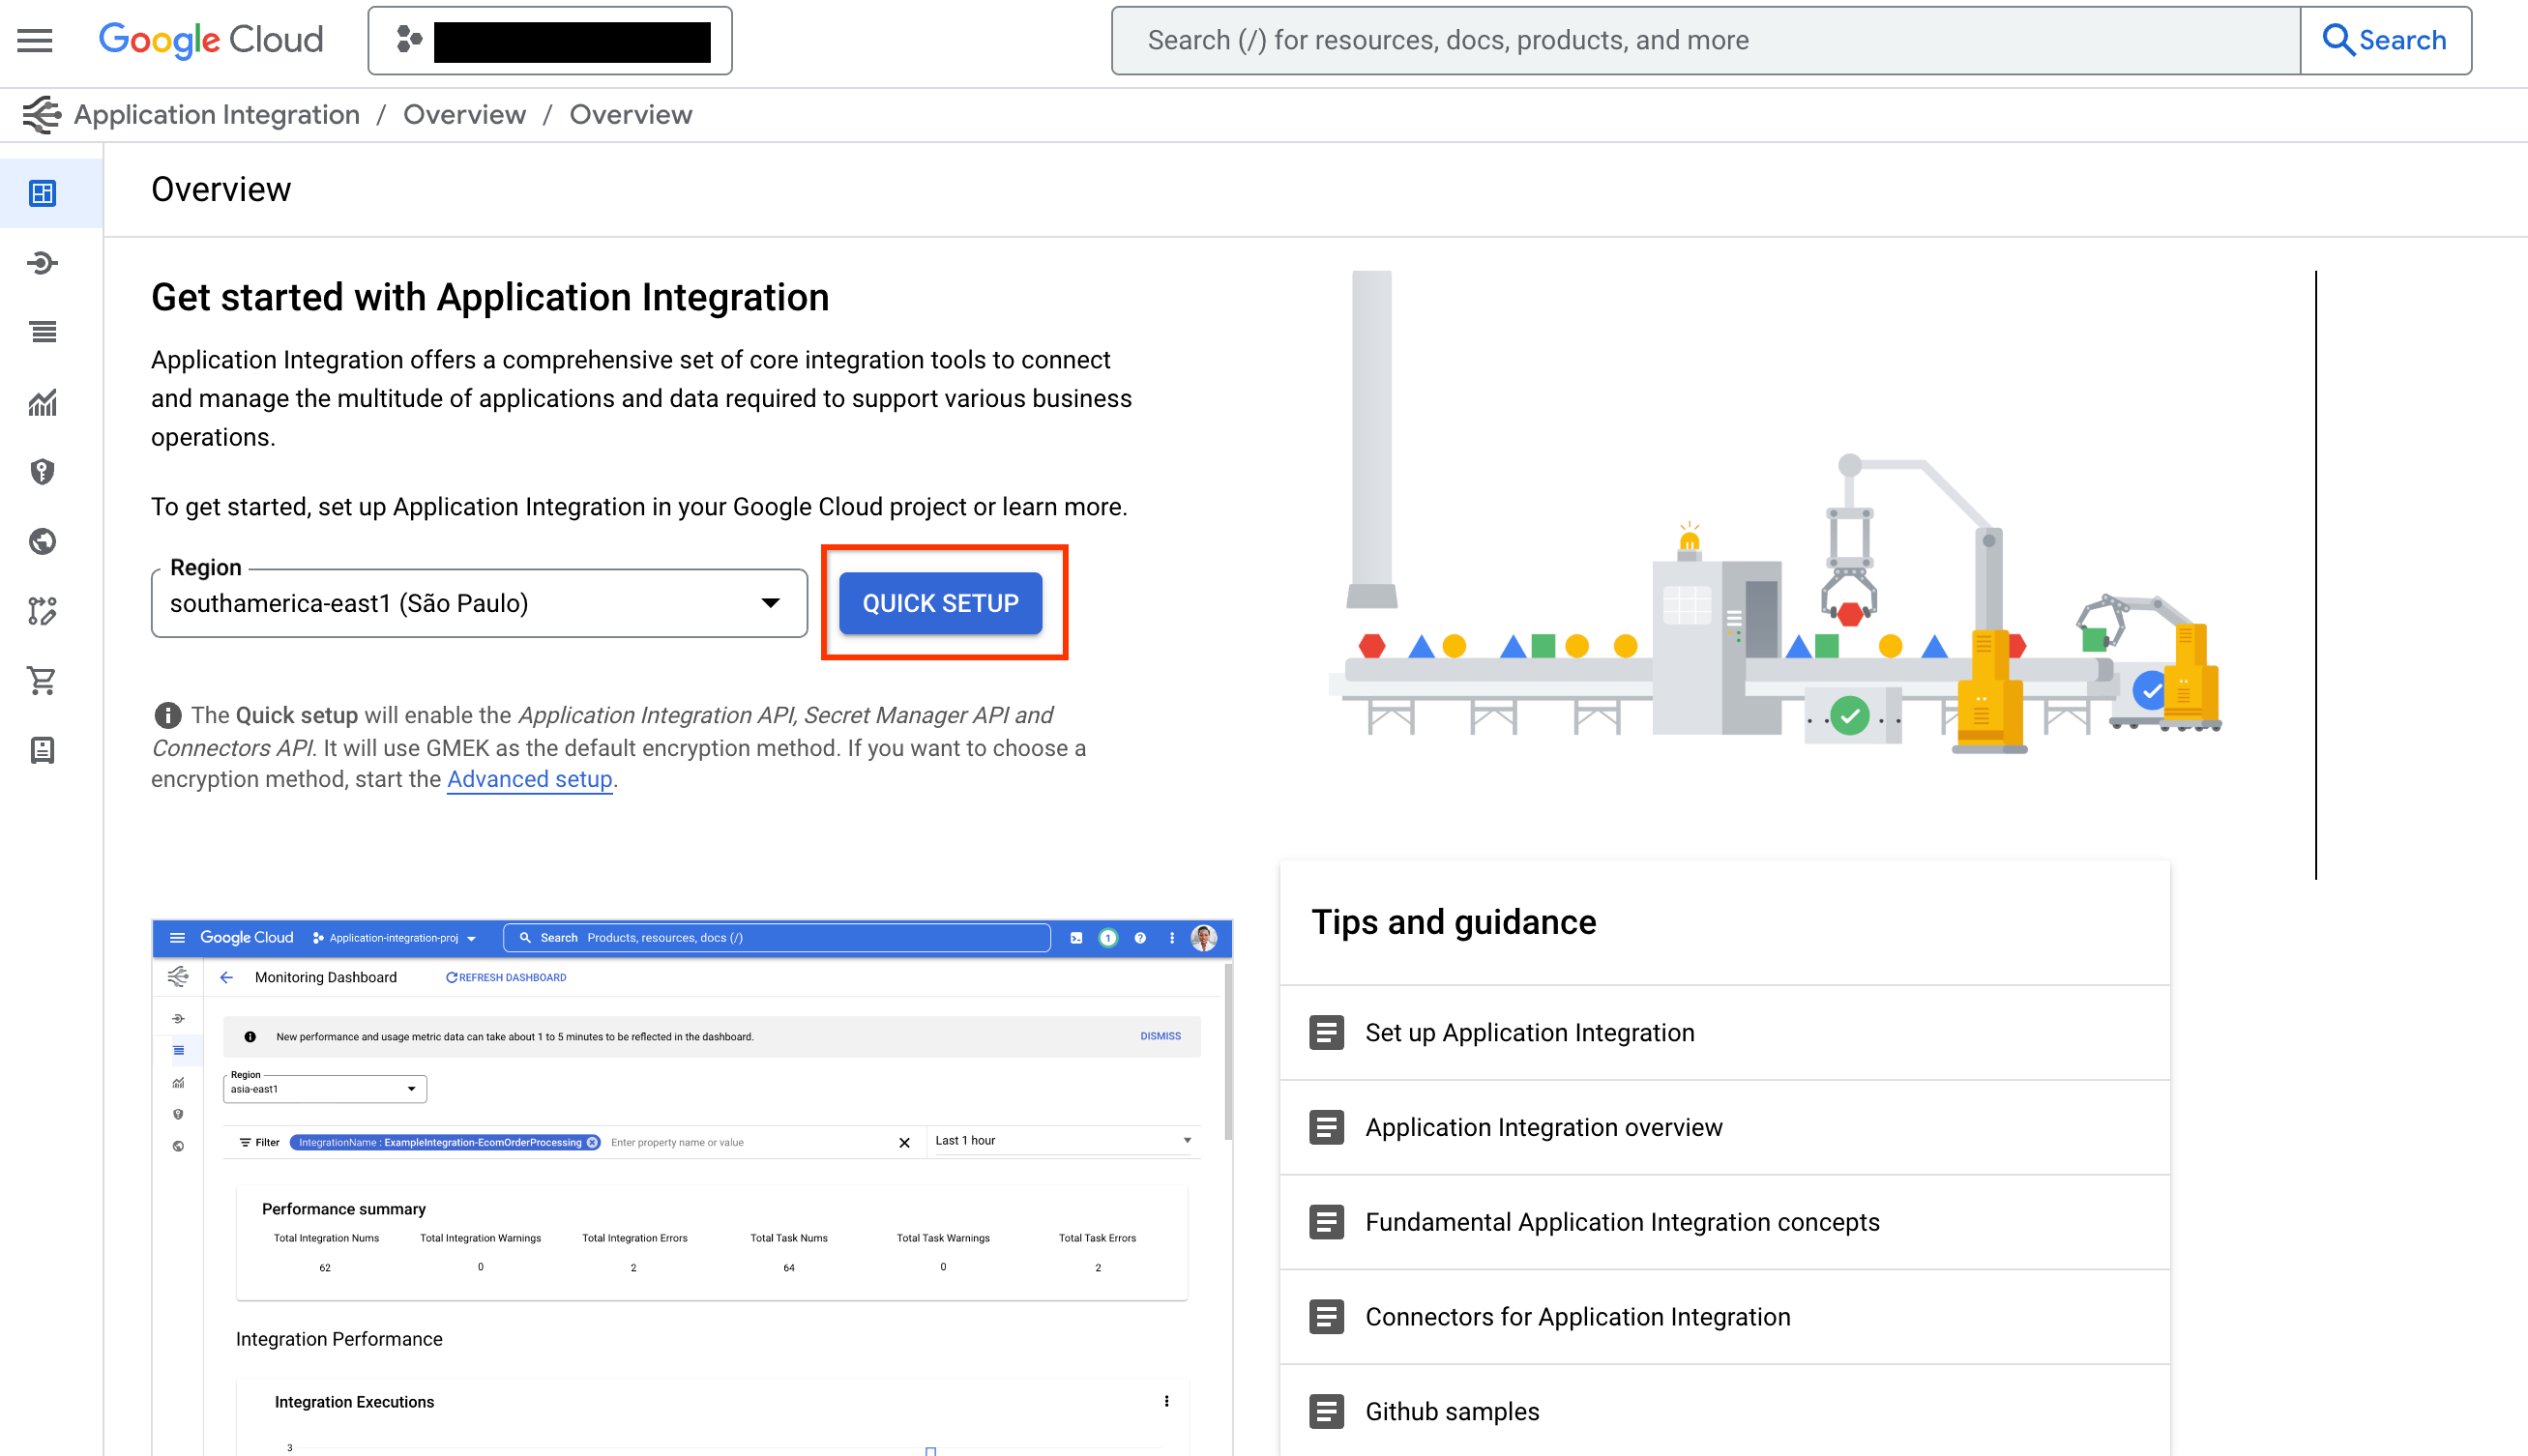
注意: ExecuteConnection integration は通常、特定リージョンで Application Integration をプロビジョニングすると自動作成されます。integrations list に ExecuteConnection がない場合は、次の手順で作成してください:
- Integration Connectors のコネクタを使うには QUICK SETUP をクリックし、 connection と同じリージョンに Application Integration を provision します。
-
テンプレートライブラリの Connection Tool テンプレートへ移動し、USE TEMPLATE をクリックします。

-
Integration Name を ExecuteConnection として入力します (この正確な名前を使う必要があります)。 次に connection と同じリージョンを選択して CREATE をクリックします。
-
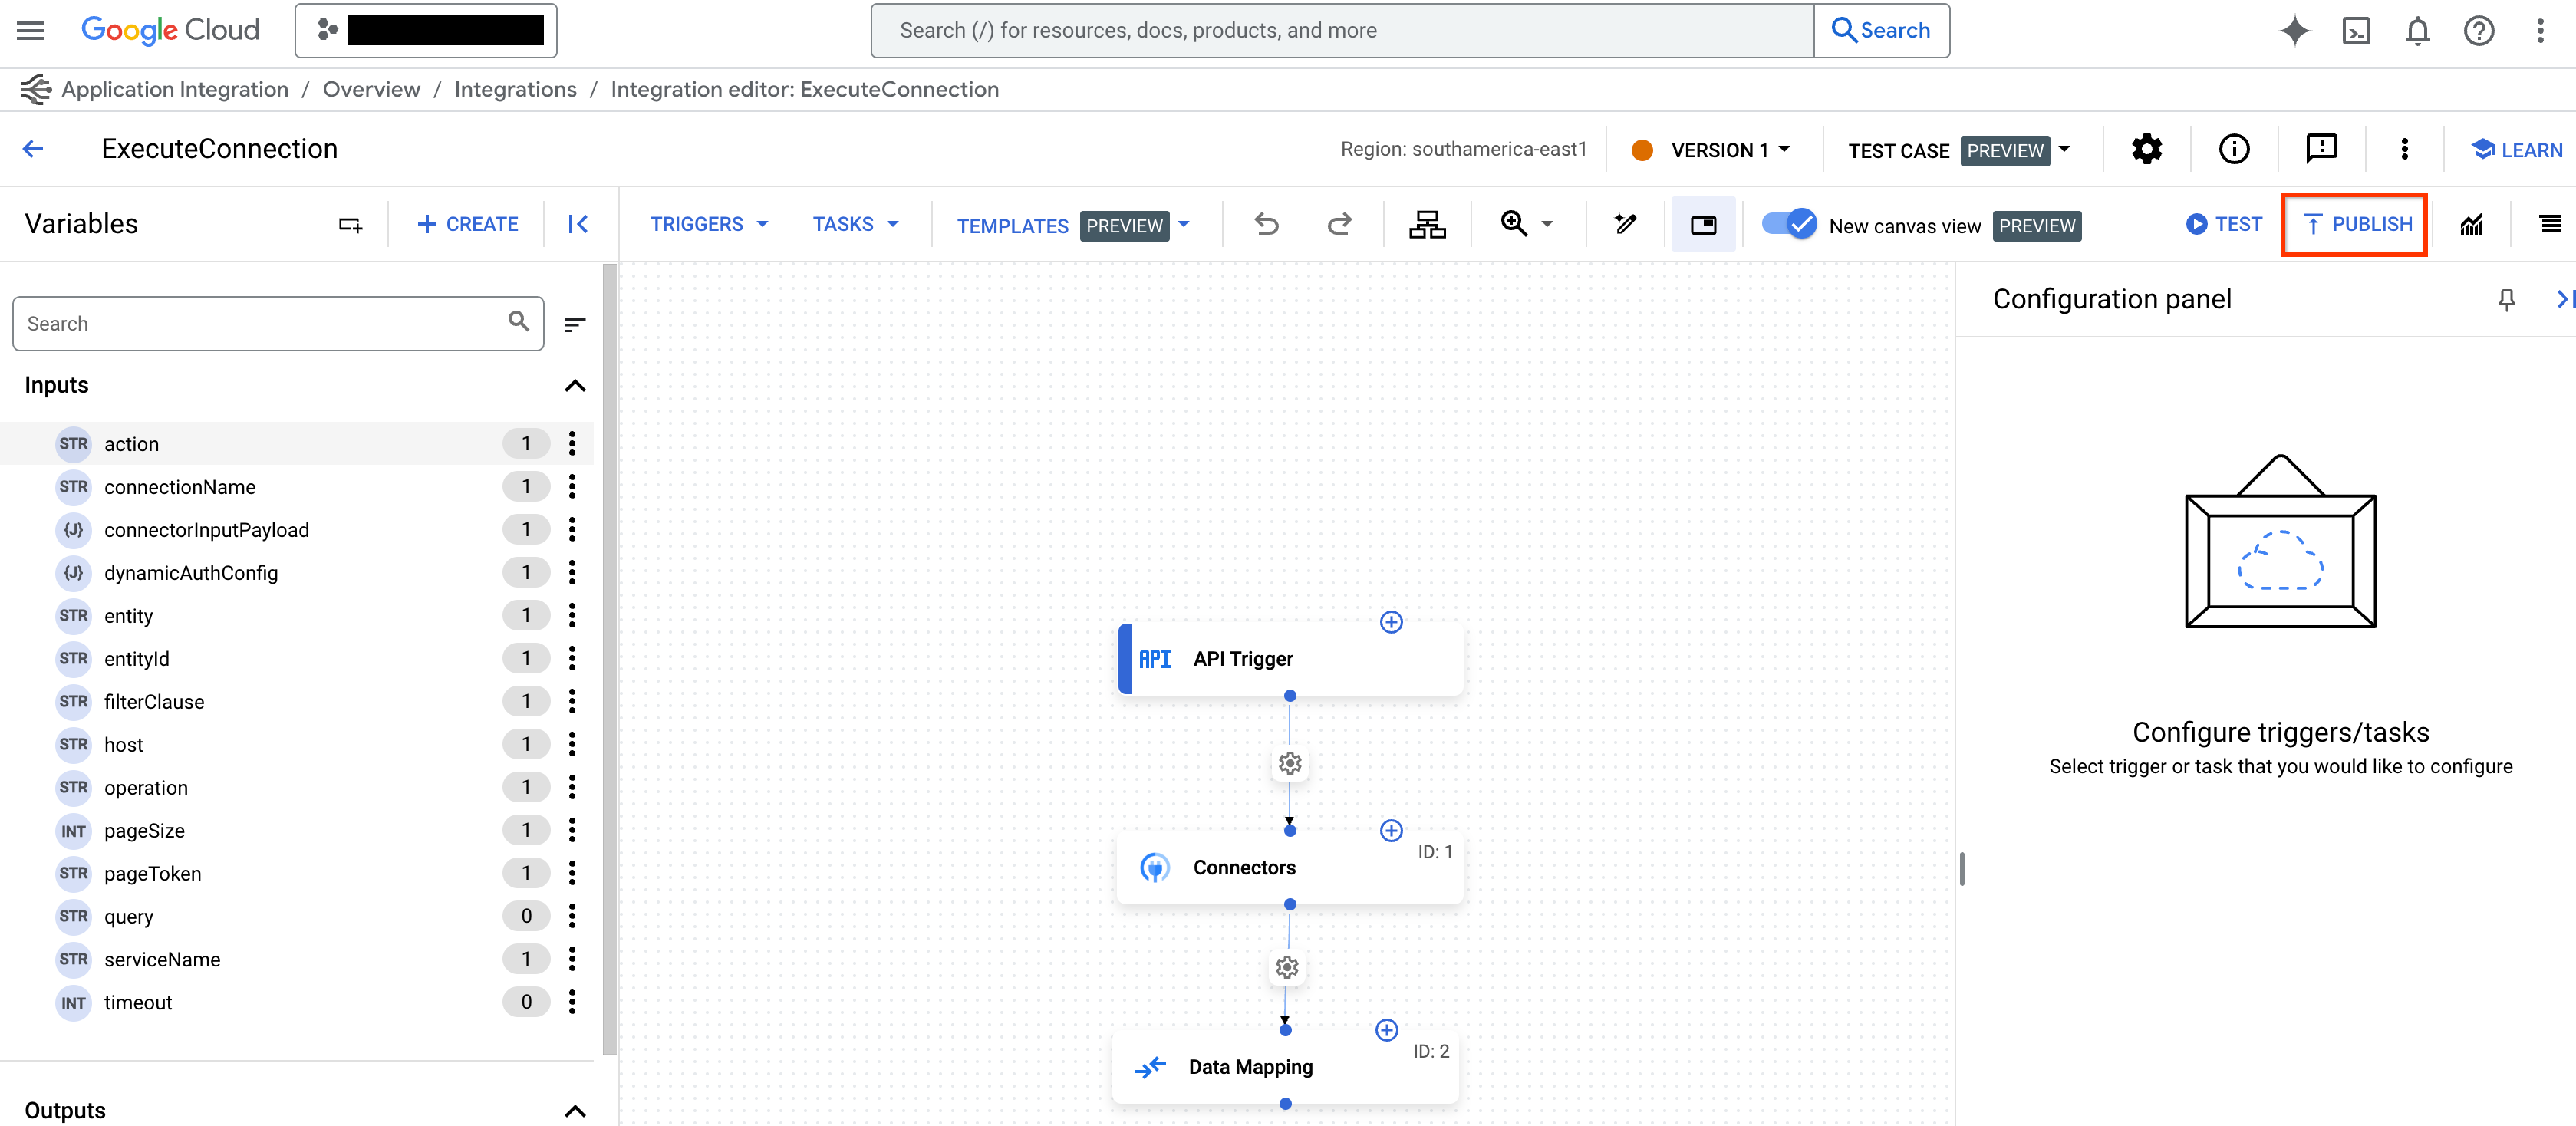
Application Integration エディタで PUBLISH をクリックして integration を公開します。
Application Integration Toolset を作成
Integration Connectors 用の Application Integration Toolset を作るには次を実施します:
-
tools.pyでApplicationIntegrationToolsetを使ってツールを作成:from google.adk.tools.application_integration_tool.application_integration_toolset import ApplicationIntegrationToolset connector_tool = ApplicationIntegrationToolset( project="test-project", # TODO: replace with GCP project of the connection location="us-central1", #TODO: replace with location of the connection connection="test-connection", #TODO: replace with connection name entity_operations={"Entity_One": ["LIST","CREATE"], "Entity_Two": []},#empty list for actions means all operations on the entity are supported. actions=["action1"], #TODO: replace with actions service_account_json='{...}', # optional. Stringified json for service account key tool_name_prefix="tool_prefix2", tool_instructions="..." )注意:
- デフォルト認証情報の代わりにサービスアカウントを使うには、Service Account Key を生成し、サービスアカウントへ適切な Application Integration and Integration Connector IAM roles を付与してください。
- connection でサポートされる entity/actions 一覧は Connector API の listActions または listEntityTypes で確認できます。
ApplicationIntegrationToolsetは Integration Connectors の 動的 OAuth2 認証 のためにauth_schemeとauth_credentialをサポートします。利用するにはtools.pyに次のように記述します:from google.adk.tools.application_integration_tool.application_integration_toolset import ApplicationIntegrationToolset from google.adk.tools.openapi_tool.auth.auth_helpers import dict_to_auth_scheme from google.adk.auth import AuthCredential from google.adk.auth import AuthCredentialTypes from google.adk.auth import OAuth2Auth oauth2_data_google_cloud = { "type": "oauth2", "flows": { "authorizationCode": { "authorizationUrl": "https://accounts.google.com/o/oauth2/auth", "tokenUrl": "https://oauth2.googleapis.com/token", "scopes": { "https://www.googleapis.com/auth/cloud-platform": ( "View and manage your data across Google Cloud Platform" " services" ), "https://www.googleapis.com/auth/calendar.readonly": "View your calendars" }, } }, } oauth_scheme = dict_to_auth_scheme(oauth2_data_google_cloud) auth_credential = AuthCredential( auth_type=AuthCredentialTypes.OAUTH2, oauth2=OAuth2Auth( client_id="...", #TODO: replace with client_id client_secret="...", #TODO: replace with client_secret ), ) connector_tool = ApplicationIntegrationToolset( project="test-project", # TODO: replace with GCP project of the connection location="us-central1", #TODO: replace with location of the connection connection="test-connection", #TODO: replace with connection name entity_operations={"Entity_One": ["LIST","CREATE"], "Entity_Two": []},#empty list for actions means all operations on the entity are supported. actions=["GET_calendars/%7BcalendarId%7D/events"], #TODO: replace with actions. this one is for list events service_account_json='{...}', # optional. Stringified json for service account key tool_name_prefix="tool_prefix2", tool_instructions="...", auth_scheme=oauth_scheme, auth_credential=auth_credential ) -
agent.pyを更新し、エージェントへツールを追加: -
__init__.pyを設定してエージェントを公開: -
Google ADK Web UI を起動してエージェントを使用:
上記完了後、http://localhost:8000 にアクセスし、
my\_agent エージェント (エージェントフォルダ名と同じ) を選択します。
Application Integration Workflows を使う
既存の Application Integration workflow をエージェントツールとして使うか、新規作成します。
1. ツールを作成
tools.py で ApplicationIntegrationToolset を使ってツールを作るには、次のコードを使います:
    integration_tool = ApplicationIntegrationToolset(
        project="test-project", # TODO: replace with GCP project of the connection
        location="us-central1", #TODO: replace with location of the connection
        integration="test-integration", #TODO: replace with integration name
        triggers=["api_trigger/test_trigger"],#TODO: replace with trigger id(s). Empty list would mean all api triggers in the integration to be considered.
        service_account_json='{...}', #optional. Stringified json for service account key
        tool_name_prefix="tool_prefix1",
        tool_instructions="..."
    )
注意: デフォルト認証情報の代わりにサービスアカウントを使うには、Service Account Key を生成し、 サービスアカウントへ適切な Application Integration and Integration Connector IAM roles を付与してください。IAM ロールの詳細は Prerequisites を参照してください。
tools.java で ApplicationIntegrationToolset を使ってツールを作るには、次のコードを使います:
    import com.google.adk.tools.applicationintegrationtoolset.ApplicationIntegrationToolset;
    import com.google.common.collect.ImmutableList;
    import com.google.common.collect.ImmutableMap;

    public class Tools {
        private static ApplicationIntegrationToolset integrationTool;
        private static ApplicationIntegrationToolset connectionsTool;

        static {
            integrationTool = new ApplicationIntegrationToolset(
                    "test-project",
                    "us-central1",
                    "test-integration",
                    ImmutableList.of("api_trigger/test-api"),
                    null,
                    null,
                    null,
                    "{...}",
                    "tool_prefix1",
                    "...");

            connectionsTool = new ApplicationIntegrationToolset(
                    "test-project",
                    "us-central1",
                    null,
                    null,
                    "test-connection",
                    ImmutableMap.of("Issue", ImmutableList.of("GET")),
                    ImmutableList.of("ExecuteCustomQuery"),
                    "{...}",
                    "tool_prefix",
                    "...");
        }
    }
注意: デフォルト認証情報の代わりにサービスアカウントを使うには、Service Account Key を生成し、適切な Application Integration and Integration Connector IAM roles をサービスアカウントへ付与してください。IAM ロール詳細は Prerequisites を参照してください。
2. エージェントへツールを追加
agent.py を更新してツールを追加するには次のコードを使います:
agent.java を更新してツールを追加するには次のコードを使います:
```java import com.google.adk.agent.LlmAgent; import com.google.adk.tools.BaseTool; import com.google.common.collect.ImmutableList;
    public class MyAgent {
        public static void main(String[] args) {
            // Assuming Tools class is defined as in the previous step
            ImmutableList<BaseTool> tools = ImmutableList.<BaseTool>builder()
                    .add(Tools.integrationTool)
                    .add(Tools.connectionsTool)
                    .build();

            // Finally, create your agent with the tools generated automatically.
            LlmAgent rootAgent = LlmAgent.builder()
                    .name("science-teacher")
                    .description("Science teacher agent")
                    .model("gemini-2.0-flash")
                    .instruction(
                            "Help user, leverage the tools you have access to."
                    )
                    .tools(tools)
                    .build();

            // You can now use rootAgent to interact with the LLM
            // For example, you can start a conversation with the agent.
        }
    }
```
注意: connection でサポートされる entity/actions 一覧は
Connector API の listActions, listEntityTypes を使って確認してください。
3. エージェントを公開
4. エージェントを使う
Google ADK Web UI を起動してエージェントを使うには次のコマンドを実行します:
上記完了後、http://localhost:8000 でmy_agent エージェント (エージェントフォルダ名と同じ) を選択してください。
Google ADK Web UI を起動してエージェントを使うには次のコマンドを実行します:
    mvn install

    mvn exec:java \
        -Dexec.mainClass="com.google.adk.web.AdkWebServer" \
        -Dexec.args="--adk.agents.source-dir=src/main/java" \
        -Dexec.classpathScope="compile"
上記完了後、http://localhost:8000 で my_agent エージェント (エージェントフォルダ名と同じ) を選択してください。